VSCODE&Python&pipenvなプロジェクト向けのtasks.jsonの個人的なサンプルだよ!
概要
今回の記事では、VSCODE&Python&pipenvなプロジェクト向けのtasks.jsonのサンプルを掲載する。
仕様書
環境
- Windows 10 Home バージョン 22H2(OSビルド 19045.2846)
- Python 3.10.6
- pyenv 3.1.1
- pipenv, version 2023.4.20
手順書
VSCODEで開いてるpyファイルをbuildコマンドで実行できるようにするtasks.jsonのサンプル。
{
    // See https://go.microsoft.com/fwlink/?LinkId=733558
    // for the documentation about the tasks.json format
    "version": "2.0.0",
    "tasks": [
        {
            "label": "run",
            "type": "shell",
            "command": "pipenv",
            "args": [
                "run",
                "python",
                "${file}",
            ],
            "group": {
                "kind": "build",
                "isDefault": true,
            },
        }
    ]
}${file}はVSCODEで開いてるファイルのパスになる。
コマンドの実行の際にコマンド毎に環境変数を設定することができる。
{
    // See https://go.microsoft.com/fwlink/?LinkId=733558
    // for the documentation about the tasks.json format
    "version": "2.0.0",
    "tasks": [
        {
            "label": "run",
            "type": "shell",
            "command": "pipenv",
            "windows": {
                "options": {
                    "env": {
                        "PATH": "C:\\cuda\\bin;C:\\Program Files\\NVIDIA GPU Computing Toolkit\\CUDA\\v11.8\\bin;C:\\Program Files\\NVIDIA GPU Computing Toolkit\\CUDA\\v11.8\\extras\\CUPTI\\lib64;C:\\Program Files\\NVIDIA GPU Computing Toolkit\\CUDA\\v11.8\\include;${env:PATH}"
                    }
                }
            },
            "args": [
                "run",
                "python",
                "${file}",
            ],
            "group": {
                "kind": "build",
                "isDefault": true,
            },
        }
    ]
}上記のサンプルは下記の記事にあるGPUに対応したPytorchの実行に必要なパスの設定をtasks.jsonで行ったサンプル。tasks.jsonでパスを通すとシステム環境変数やユーザーの環境変数でパスを通しておく必要がなくなる。
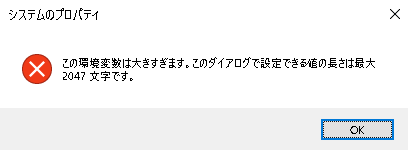
どちらが良いとは一概には言えないのでお好みで。私の場合は、システム環境変数の値がダイアログで設定できる最大文字数「2047」のギリギリだったのでtasks.jsonで設定する方法を採用した。
こんな感じで怒られる。
まとめ(感想文)
tasks.jsonって奥が深い。


